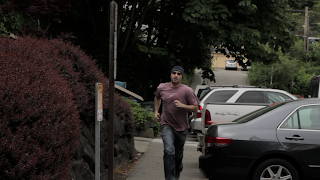
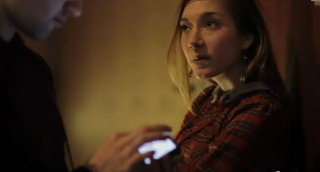
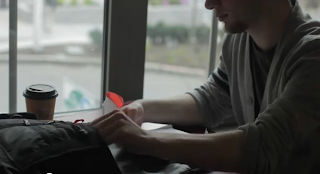
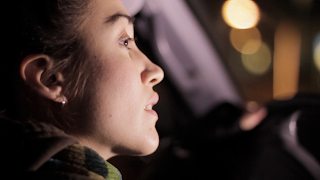
A short movie by friends and members of the Citizen L project (coming to the screen in the spring of 2012)
Saturday, December 3, 2011
Thursday, April 7, 2011
SYNOPSIS
Alex, an unemployed construction worker and a struggling design student, appears to catch a break when his class is taken over by the "History 2.0" show, a sketchy web-based reality series in which students compete for tuition money by concocting creative documentaries about historical events. Alex's team proposes a video exploring the civil rights movement through the eyes of Coretta Scott King (the wife of MLK)--but when the "Coretta" concept begins to flounder, a desperate Alex conspires to profit from the project's demise.
RUSHES
These clips consist of raw shots and roughly edited sequences (used to gauge the movie's development and to plan upcoming shoots). Sound for this footage (including dialogue) is still being captured and mixed. Color, lighting, shot selections, transitions, and other cinematic elements will be fine-tuned throughout the post-production process.
These clips will look better if you set the Youtube display to 720p (and they'll look better yet if you get a chance to see them projected at 1080p, the resolution they were shot at).
 |
| Click here to view scene 1 |
 |
| Click here to view footage from scene 32 |
 | ||
Click here to view a shot from scene 12
|
 | ||
Click here to view a shot from scene 8
|
SCRIPT
Click here to download the latest draft of the shooting script:
http://arts.cornish.edu/theater/th264/Ulysses2.0/Ulysses2.0_Nov.3,2011.pdf
http://arts.cornish.edu/theater/th264/Ulysses2.0/Ulysses2.0_Nov.3,2011.pdf
SPECS
1. CINEMATOGRAPHY
We're now shooting primarily in DSLR high-definition video using Canon t2i bodies with Nikon and Canon lenses. Some footage is being captured in HDV video (some of the black and white footage for the title sequence, for instance).
Unless directed otherwise, cinematographers on the project should follow these parameters:
2. FILE MANAGEMENT for STORAGE and EDITING
Canon DSLR cameras produce files that function pretty well on your computer desktop but not in an FCP time line. Consequently it's necessary to convert footage to an "intermediate codec" for editing. It's pretty easy though--just follow this sequence:
3. MAKE UP
Ulysses 2.0 takes place at an art college pretty much like Cornish--consequently, your everyday appearance will work well for us. That said, acting on screen can automatically present certain problems (including glare from skin and the appearance of darkened eye wells). Here's a short article discussing tips for minimizing these issues:
http://www.associatedcontent.com/article/36987/how_to_apply_makeup_for_photos_and.html?cat=69
We're now shooting primarily in DSLR high-definition video using Canon t2i bodies with Nikon and Canon lenses. Some footage is being captured in HDV video (some of the black and white footage for the title sequence, for instance).
Unless directed otherwise, cinematographers on the project should follow these parameters:
- Shoot at "30p" frame rate (30 fps progressive).
- Adjust camera to "neutral" picture style and use the following settings: Sharpness, "0" (all the way left); Contrast, "neg. 4" (all the way left); Saturation, "neg. 2" (two clicks left); Color tone, "0" (center). To do all this, scroll through the "menu" options until you see "picture style"; hit the "set" button and then highlight the "neutral" option and then hit the "disp." button, at which point you'll see the inputs described above (sharpness, contrast, etc.).
- Check the white balance at the start of every shoot and anytime lighting or setting changes. To do this, hit the "Q" button and use the thumb wheel to scroll through the pre-configured settings (and to see if any look good). ("Tungsten" means normal indoor lighting and "Florescent" means long, greenish white tubes--common on campus). If none look usable, scroll through the "menu" function to find the "Custom white balance" sequence. (In any case, do not change white balance setting in the middle of a shot and do not use "Auto white balance.")
- Set shutter speed for "60" and leave it there (unless you intend to introduce strobing or other visual effects).
- Adjust aperture and ISO as you see fit--but be aware that ISO will begin adding a lot of grain at about 400 (and that footage shot at ISO 1600 or higher will likely be too grainy for us to use). Remember that a bigger aperture (smaller f-stop number) gives you narrower depth of field (in addition to increased exposure).
- Use depth-of-field creatively and aggressively (it's one of the reasons we're using DSLR cameras). But watch out for overly narrow focus--something you see a lot in amateur DSLR footage. (For instance if an actor's eyes are in focus, the tip of her nose should probably be in focus too.) Related to this: Avoid excessively blurry background/foreground (another thing you see a lot in amateur DSLR footage). The surest way to gain selective focus is to adjust your aperture. (An f-stop number below 5 or so will begin to show selective depth of field). With the Nikon lenses, adjust f-stop with the manual ring on the lens; with the canon lenses, press the "AV" button while spinning the thumb wheel.
2. FILE MANAGEMENT for STORAGE and EDITING
Canon DSLR cameras produce files that function pretty well on your computer desktop but not in an FCP time line. Consequently it's necessary to convert footage to an "intermediate codec" for editing. It's pretty easy though--just follow this sequence:
- Make sure your raw footage is backed up. (Don't convert any footage that hasn't first been copied and saved on a couple of different drives. Ask about this if you're getting footage from someone else.)
- Go to the Apple Compressor application (bundled with FCP). When Compressor opens up, hit the "Import" menu link and find the file you want to convert.
- Your file will show up as a rectangular box at the top of the interface, and you'll then need to drag two selections ("Destinations" and "Settings") from the lower part of the interface back up to your file box.
- In the "Destination" tab down below, find "Desktop" and drag the icon up to the box up top that represents your selected file. (This way when the file is finished it will appear on your computer desktop; you'll then be able import it into a FCP time line.)
- In the "Setting" tab go to "Apple," then "Other Workflows," then "Apple Codecs." From the "Apple Codecs" folder select "Apple ProRes 422 for Progressive material" and drag it up to your box. This is crucial: We want "ProRes 422 for Progressive material" (not "422 for interlaced," and not "422 High Quality").
- That should basically do it. Hit the "Submit" button and wait for your file to convert. (You can convert multiple files simultaneously if you like.) The ProRes file will be about twice as large as the original (but it will retain a lot of its original info--a good thing--and it will handle really smoothly in your FCP timeline).
3. MAKE UP
Ulysses 2.0 takes place at an art college pretty much like Cornish--consequently, your everyday appearance will work well for us. That said, acting on screen can automatically present certain problems (including glare from skin and the appearance of darkened eye wells). Here's a short article discussing tips for minimizing these issues:
http://www.associatedcontent.com/article/36987/how_to_apply_makeup_for_photos_and.html?cat=69
SCORE
The movie score currently includes four distinct contributions.
- The Seattle-based band Tompten (Brian Noyeswatkins, Lena Simon, Gregg Belisle-Chi, and Jake Brady--all four recent graduates of the Cornish music department) is graciously allowing us to use the track "Sonny Don't" (from their self-titled debut album).
- Band members Gregg Belisle-Chi and Jake Brady teamed up with vocalist Chelsea Crabtree (another Cornish alum) to compose and record an original track entitled "Boat Song."
- Seattle-based accordionist Jamie Maschler (also a Cornish graduate) arranged and recorded her own rendition of a traditional tango piece entitled "El Choclo."
- Seattle-based producer (and Cornish senior) Kjell Nelson is currently crafting an original piece of electronica.
Subscribe to:
Comments (Atom)


